With almost guaranteed ridicule from the Kawak Boys in the Kawak Forum, I post this here in "Other". Because, really the purpose of this thread is for discussion of the Lifan 200cc 163FML-169FML and it's possible Intake/exhaust mods and configurations.
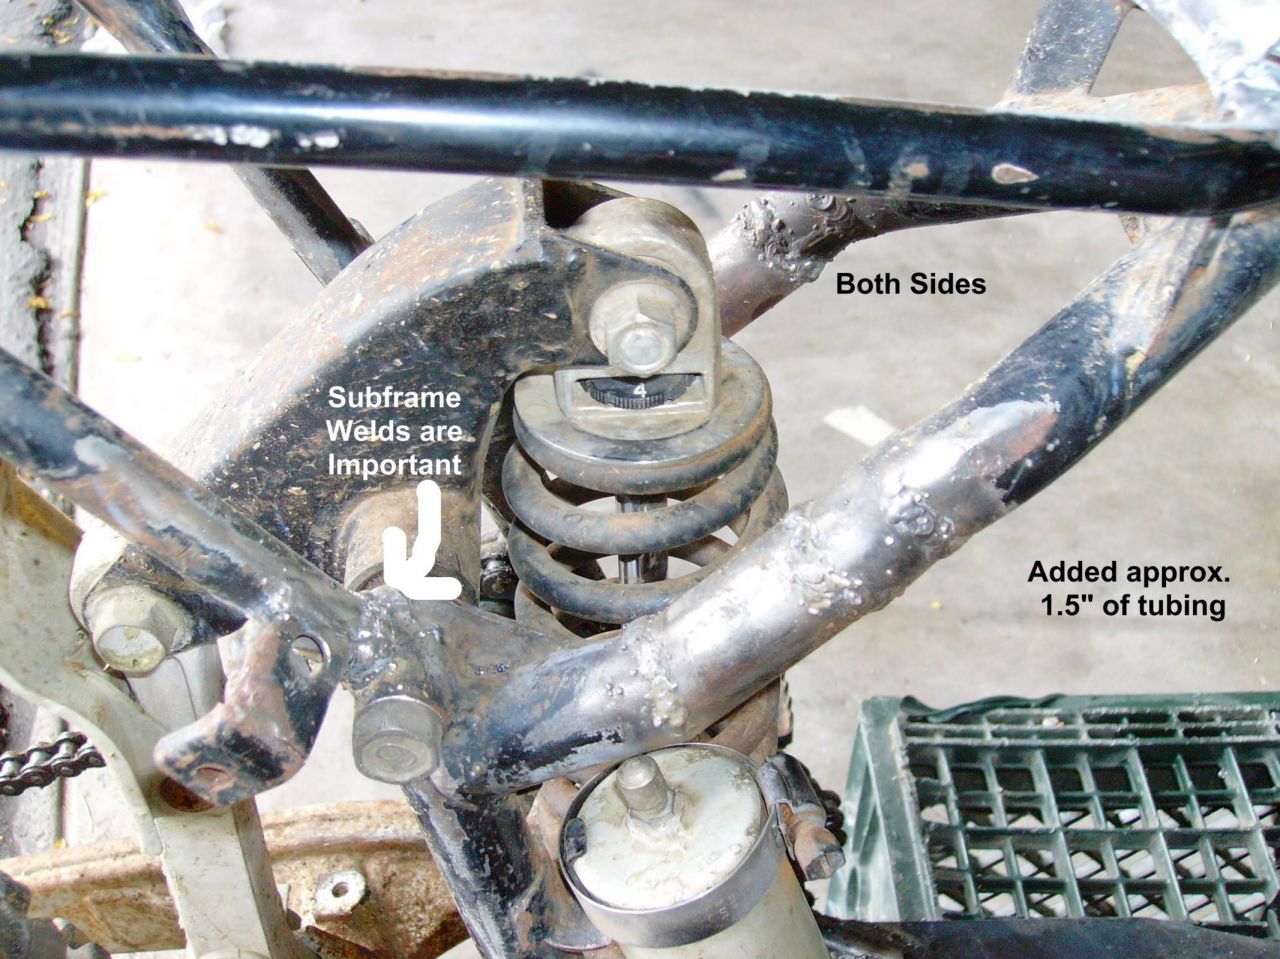
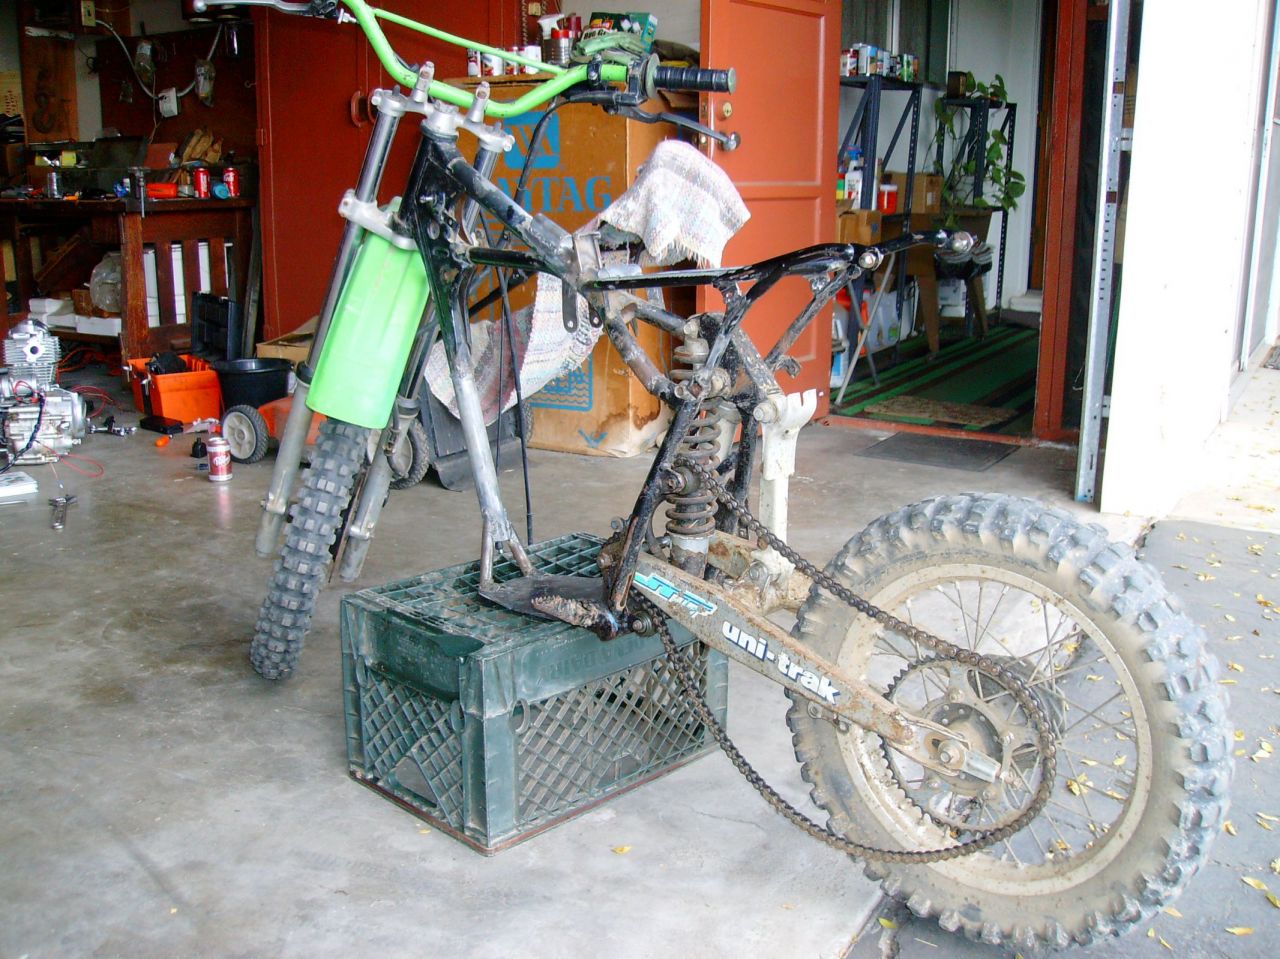
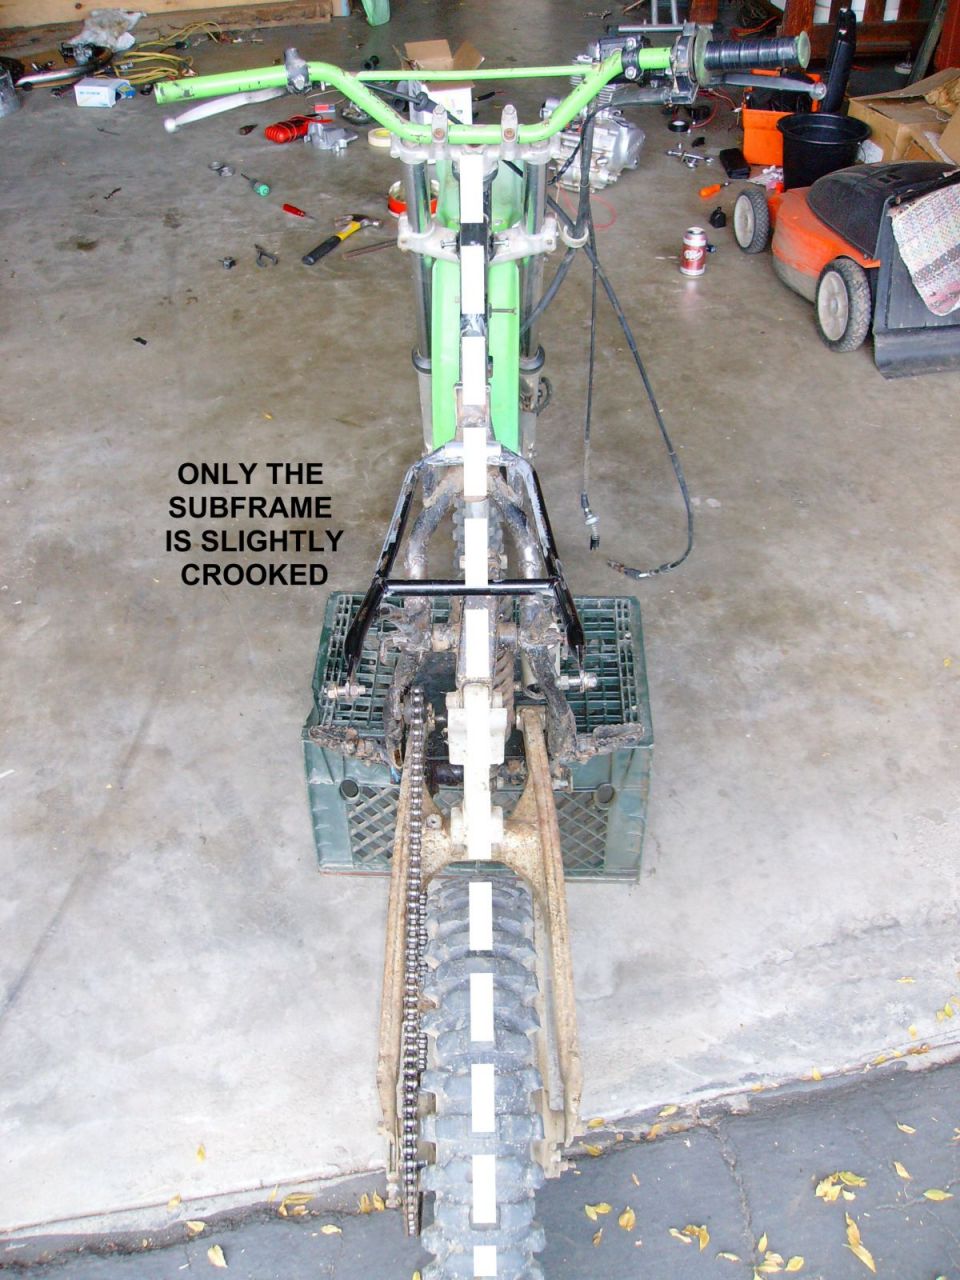
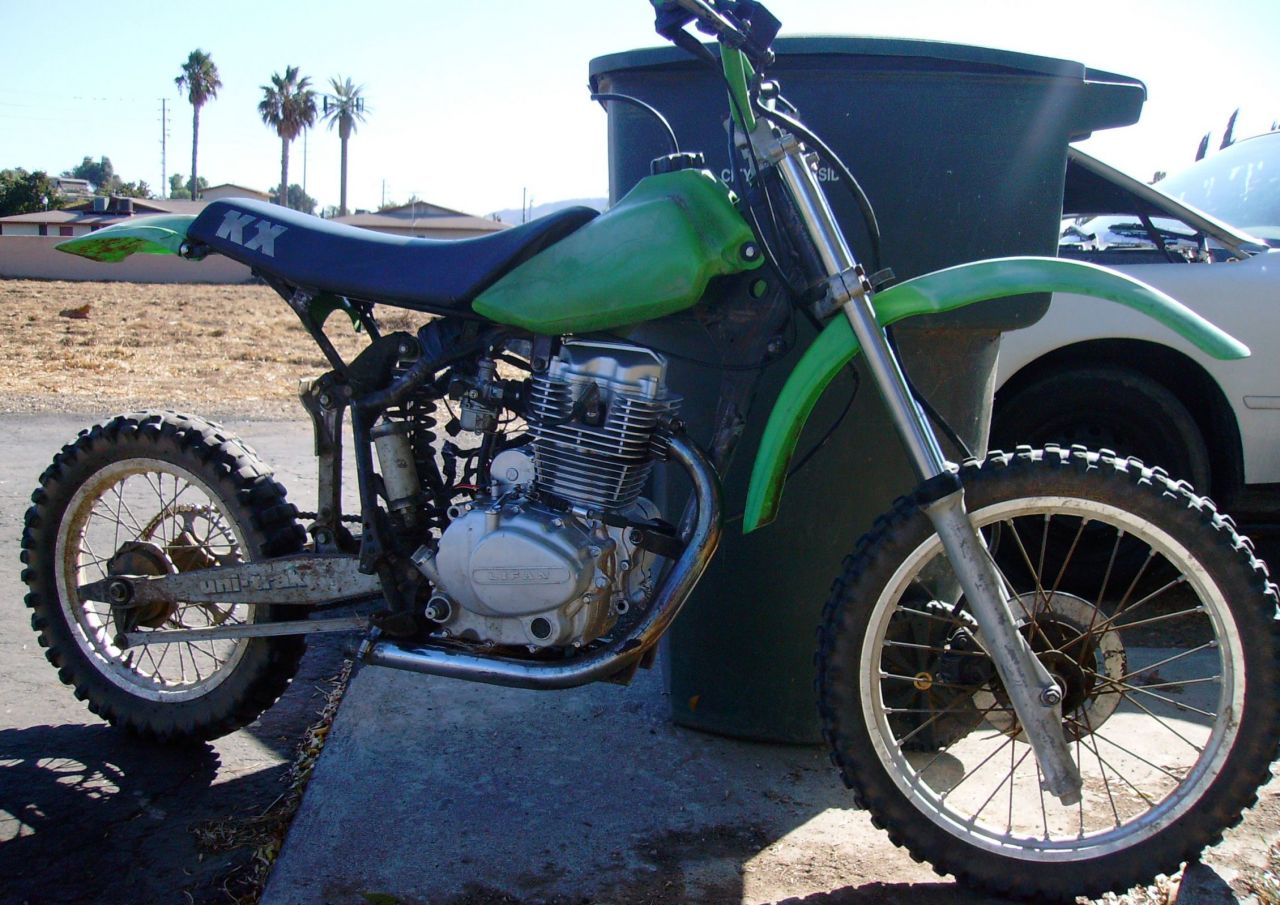
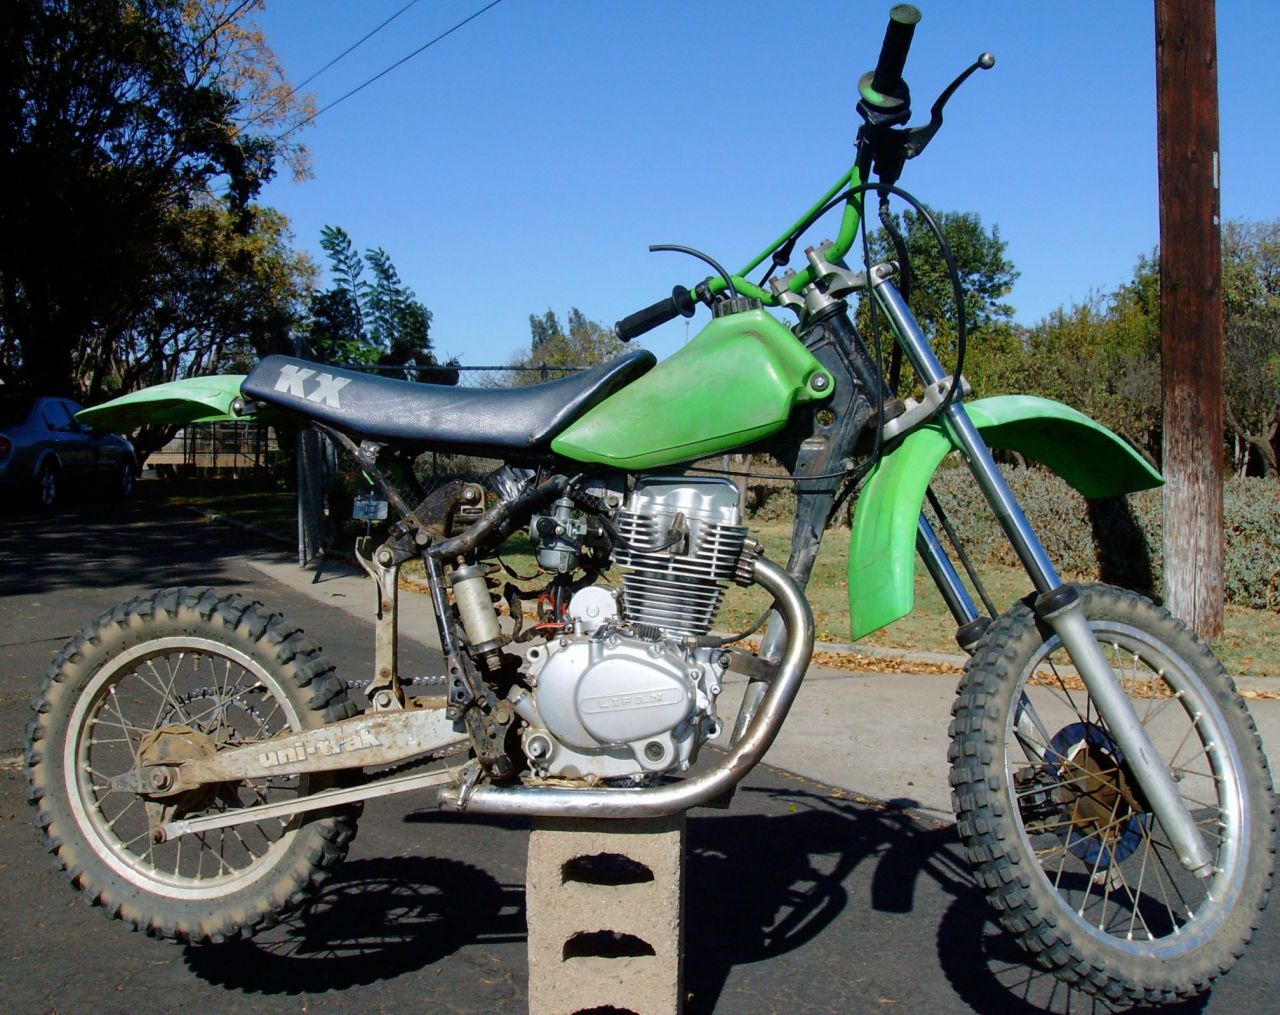
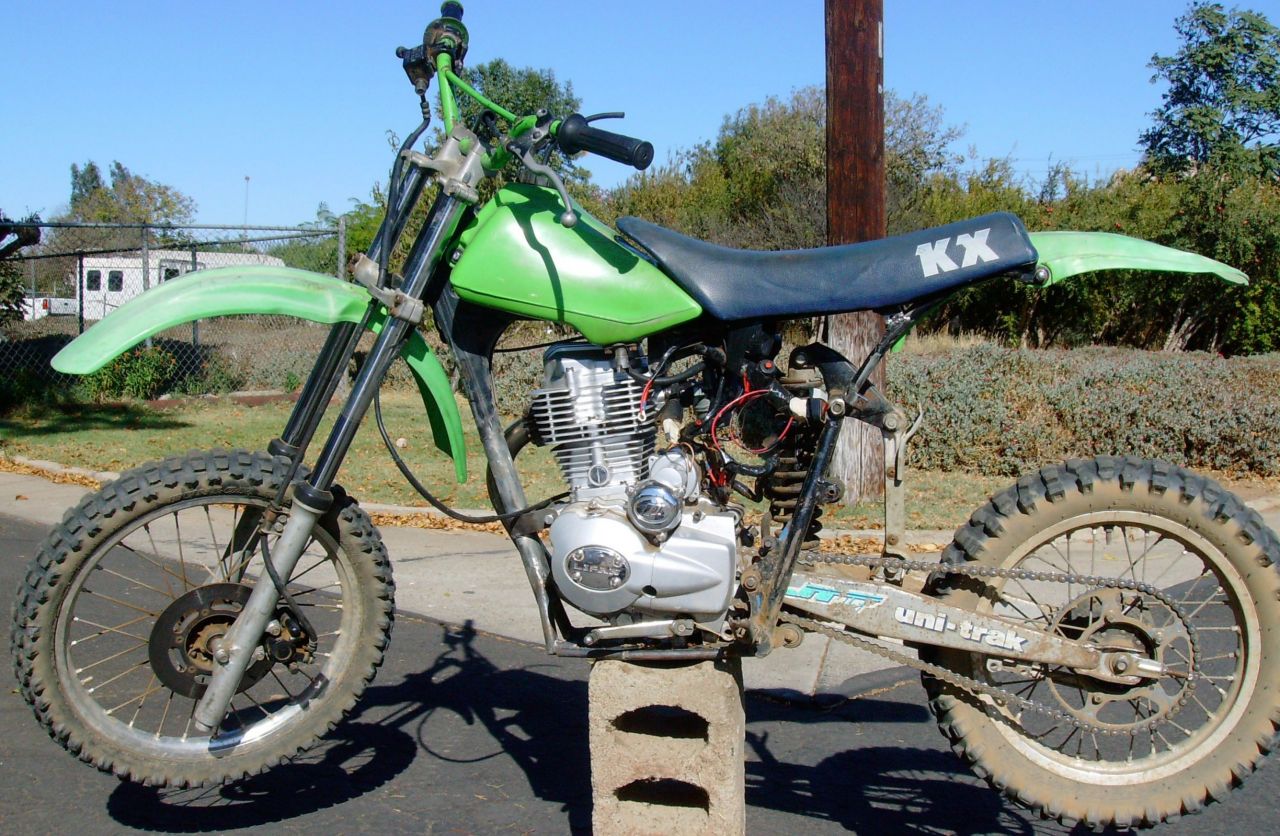
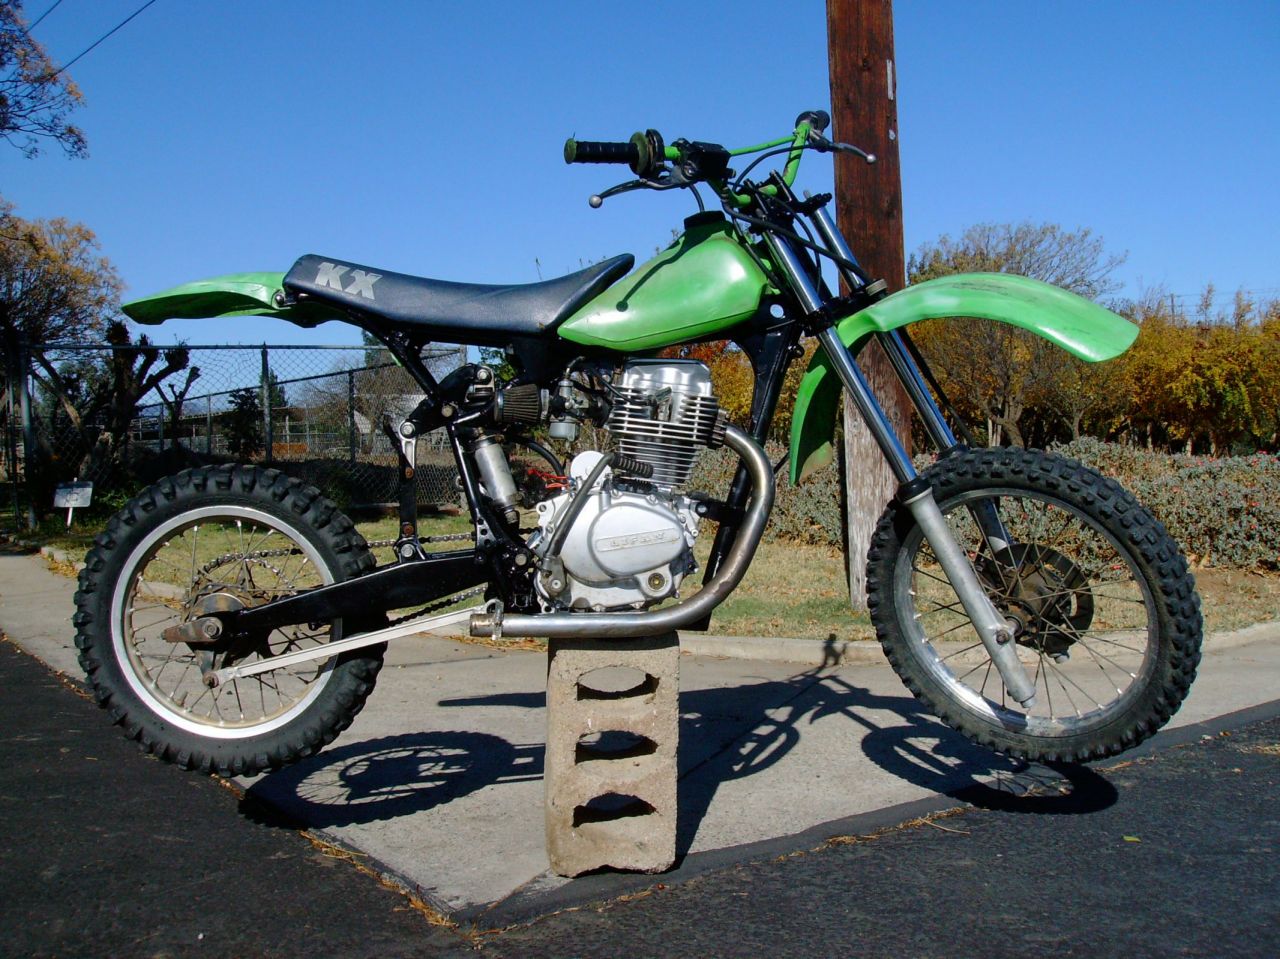
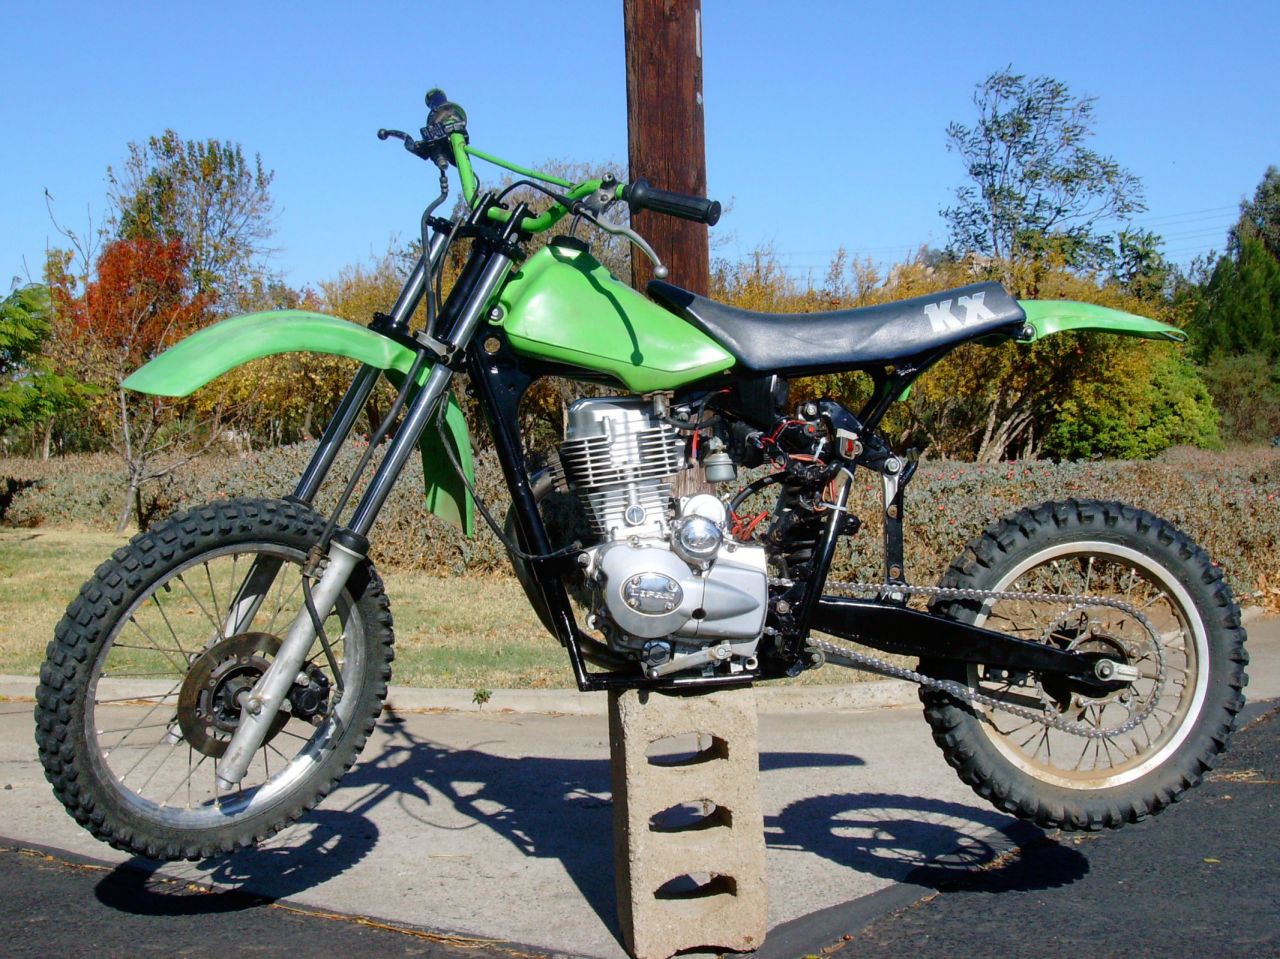
Lots of folks buy one or happen apon a Lifan 200cc vertical engine badged 163fml or 169fml. I was given mine free of charge. I went out and found a MAN sized mini. The 1984 Kawasaki KX80 fit me nice and had a simple enough frame to modify for jamming in the enormous 69lb vertical. Hooray! "There is no replacement for displacement."
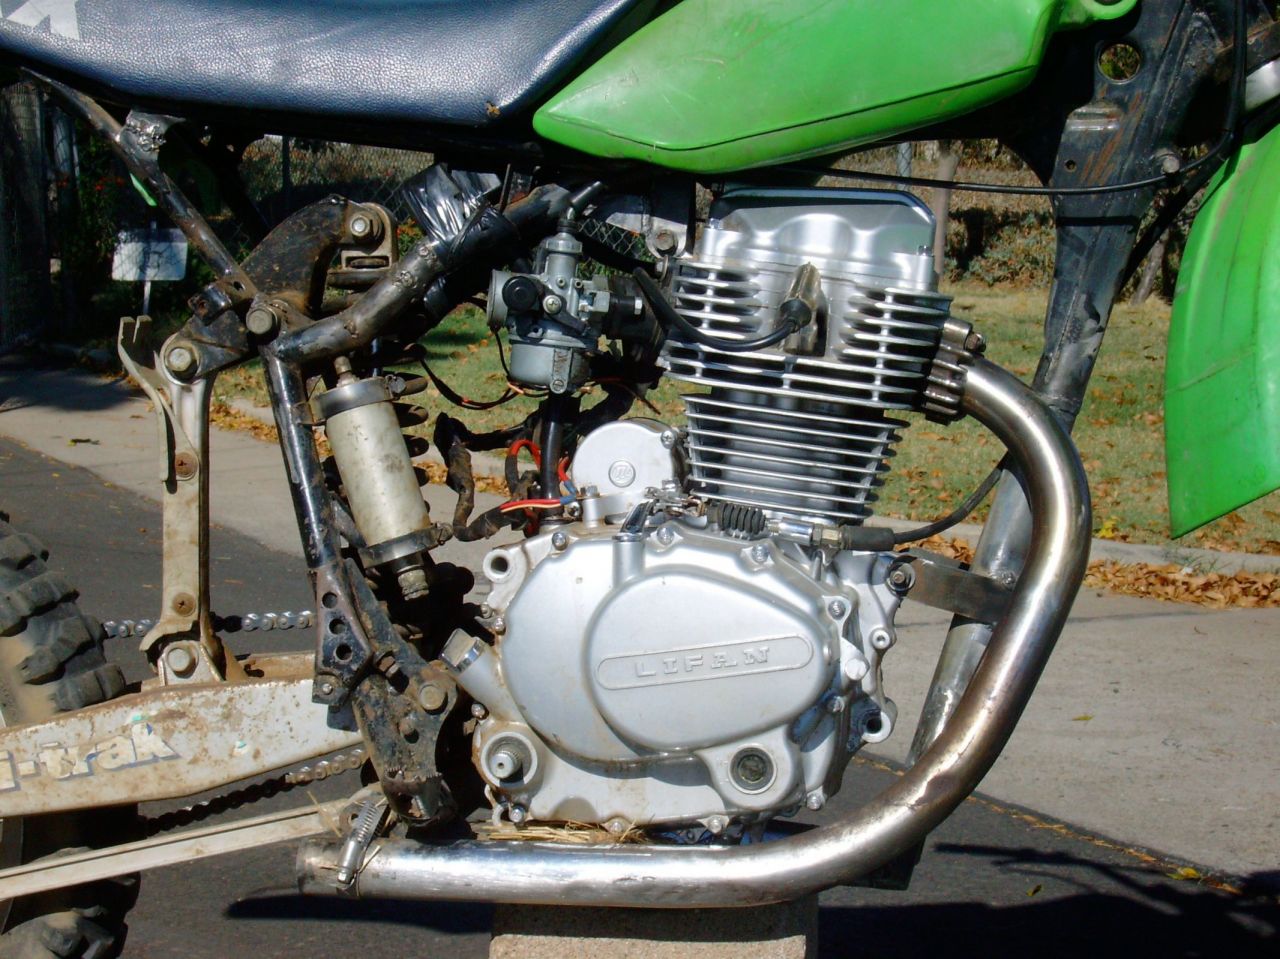
LIFAN 163fml and 169fml have approximatly the same displacement. 197-198cc. One engine is over square (169fml) and the other is just about perfectly square (163fml). The square motor 163 will be a beautiful balance of horsepower and torque. Lots of low end and a powerful yet short top end. Maybe 8500-9000rpm redline.
Now an "over square" engine 169 has a shorter stroke then bore. These engines will rev more easily and have a higher powerband setting (500rpm). Maybe 9000-9500rpm redline. But the downsides are less torque (negligible), and less engine braking. The engine will spin very freely and have more of a "rush" of power rather then a "lump". On the road. The LF200III (streetbike)has the 169fml. In the dirt you want more lump out of the corners with the 163fml.
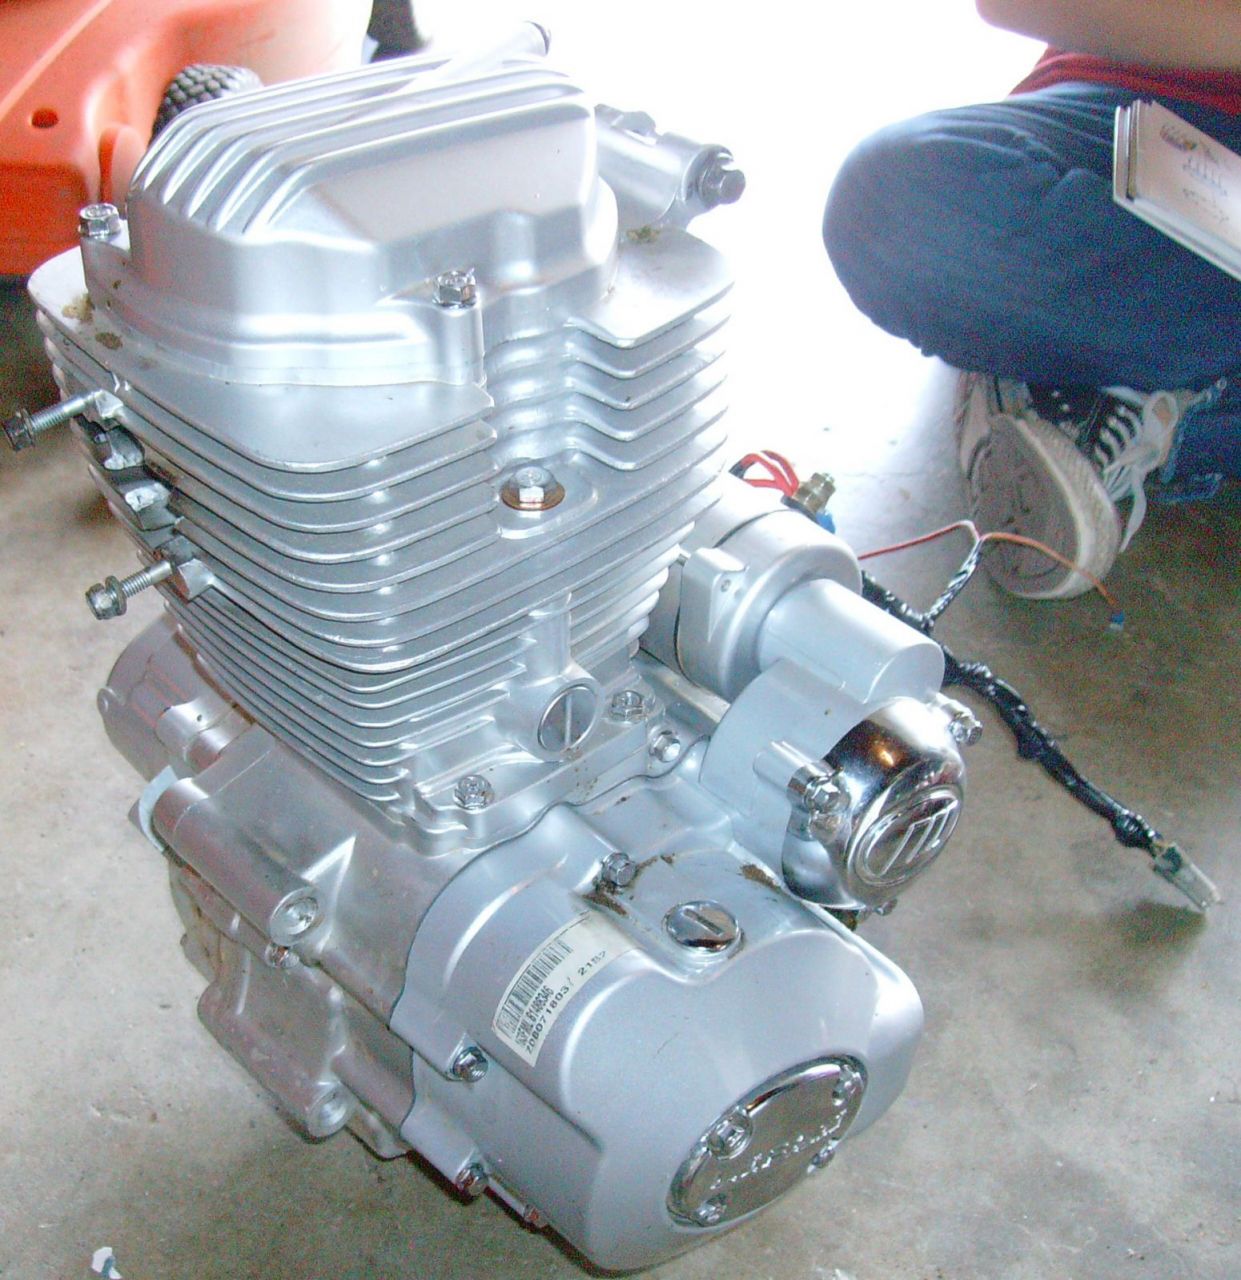
THIS IS MINE, 163fml BADGED LIFAN
Stay tuned to this thread for extensive CARB JET VS. EXHAUST SYSTEM TUNING.
Multiple carbs, multiple exhaust systems, extensive jet kits, lots of trial and error. This is going to be fun. I'm going to try porting the heads. Give me some MOD ideas and i'll give anything a try. Let's do some nasty uncontrollable wheelies!
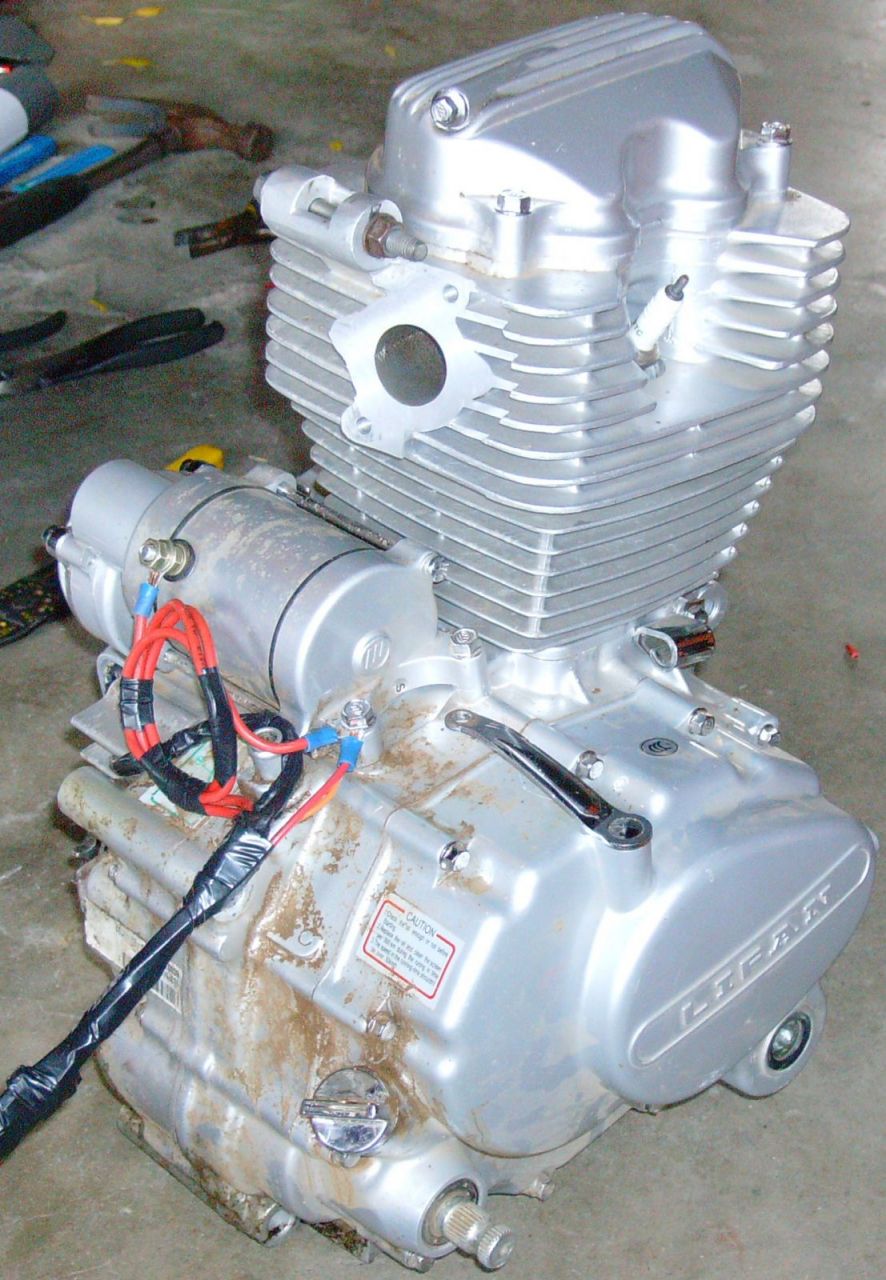
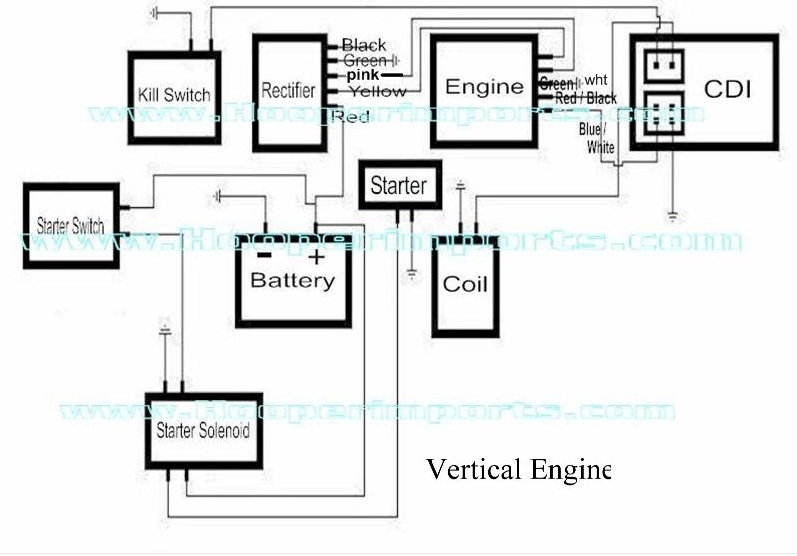
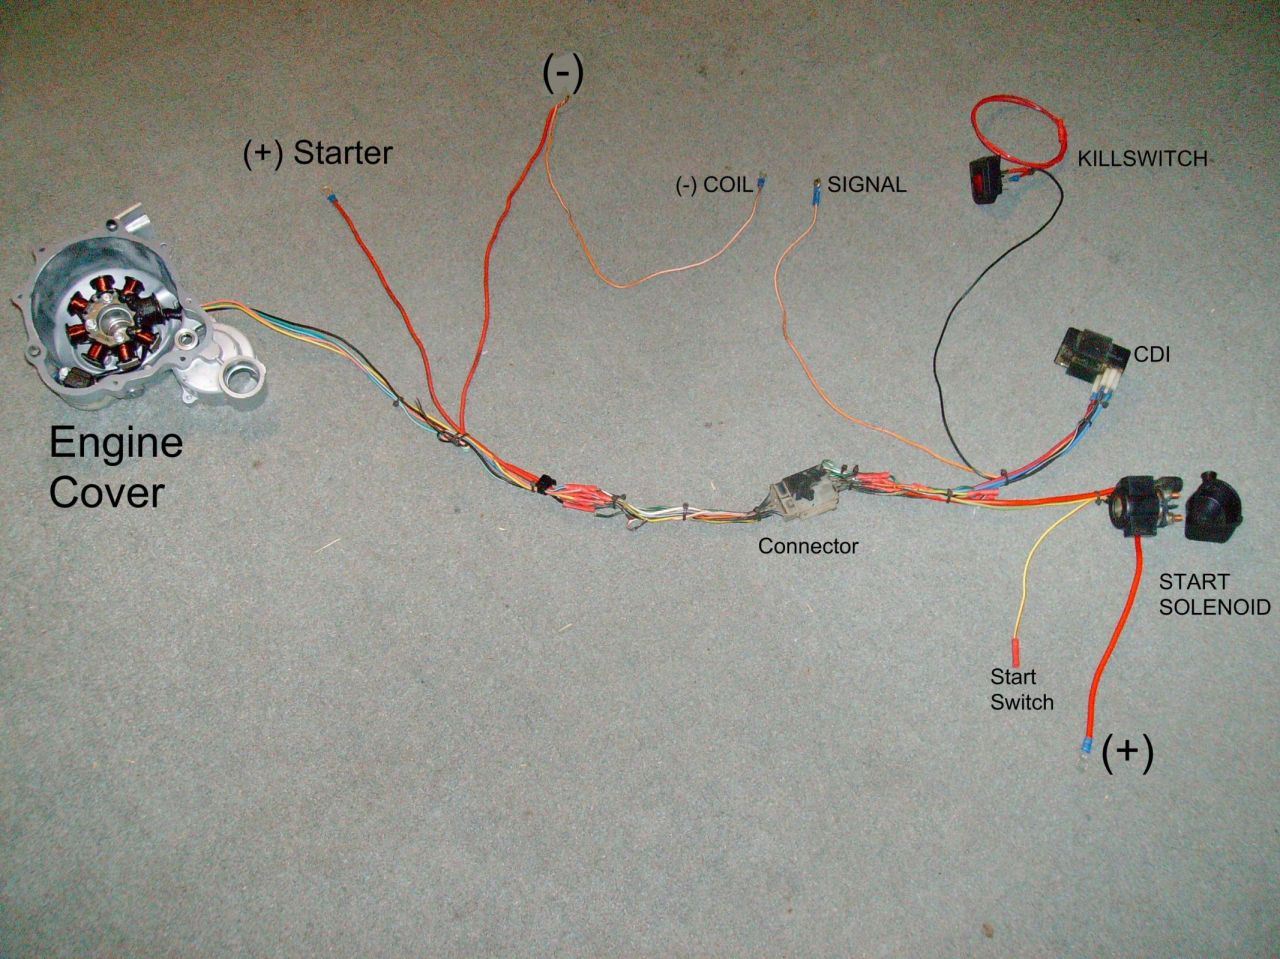
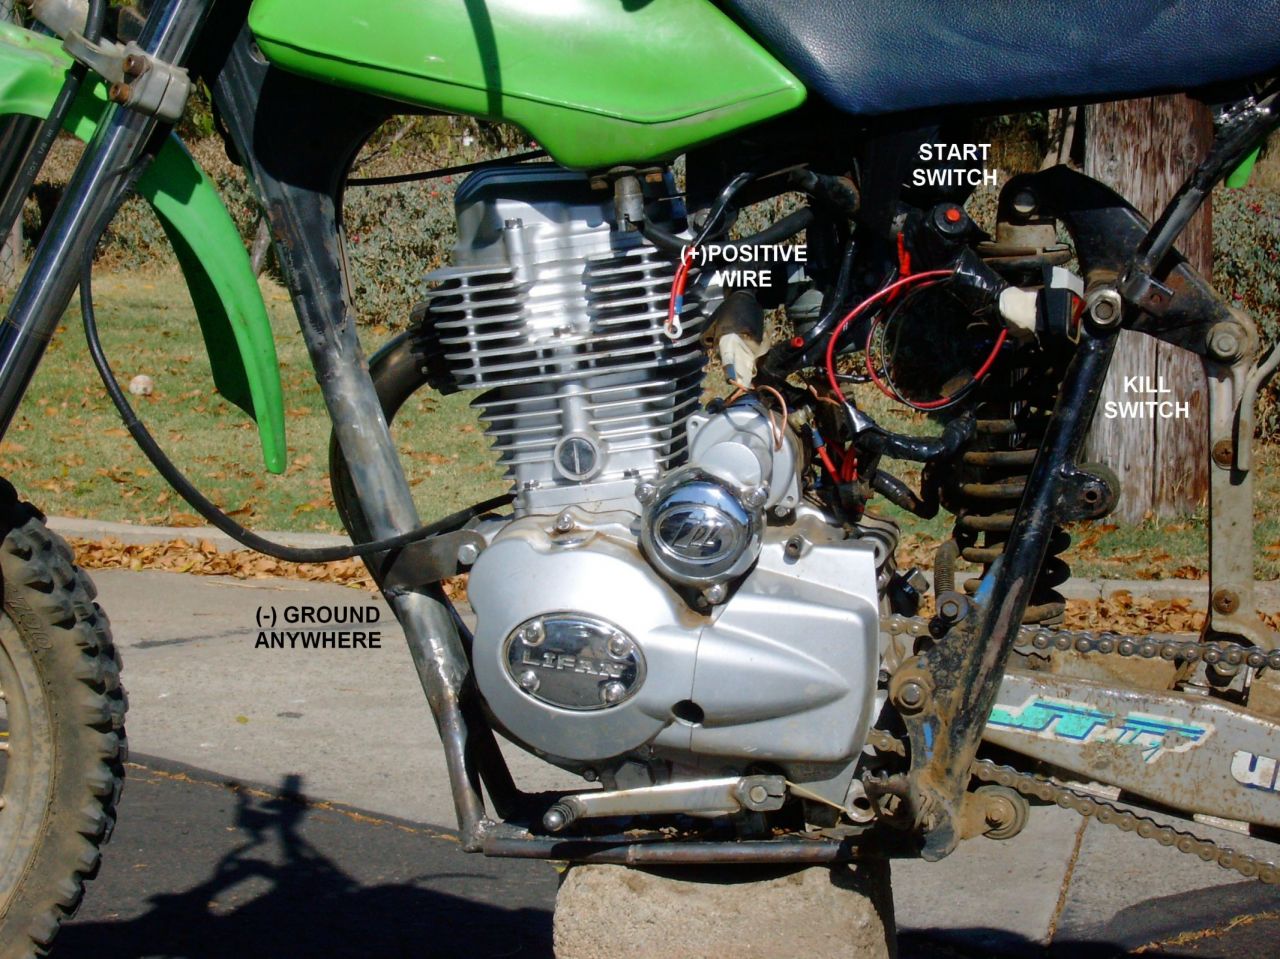
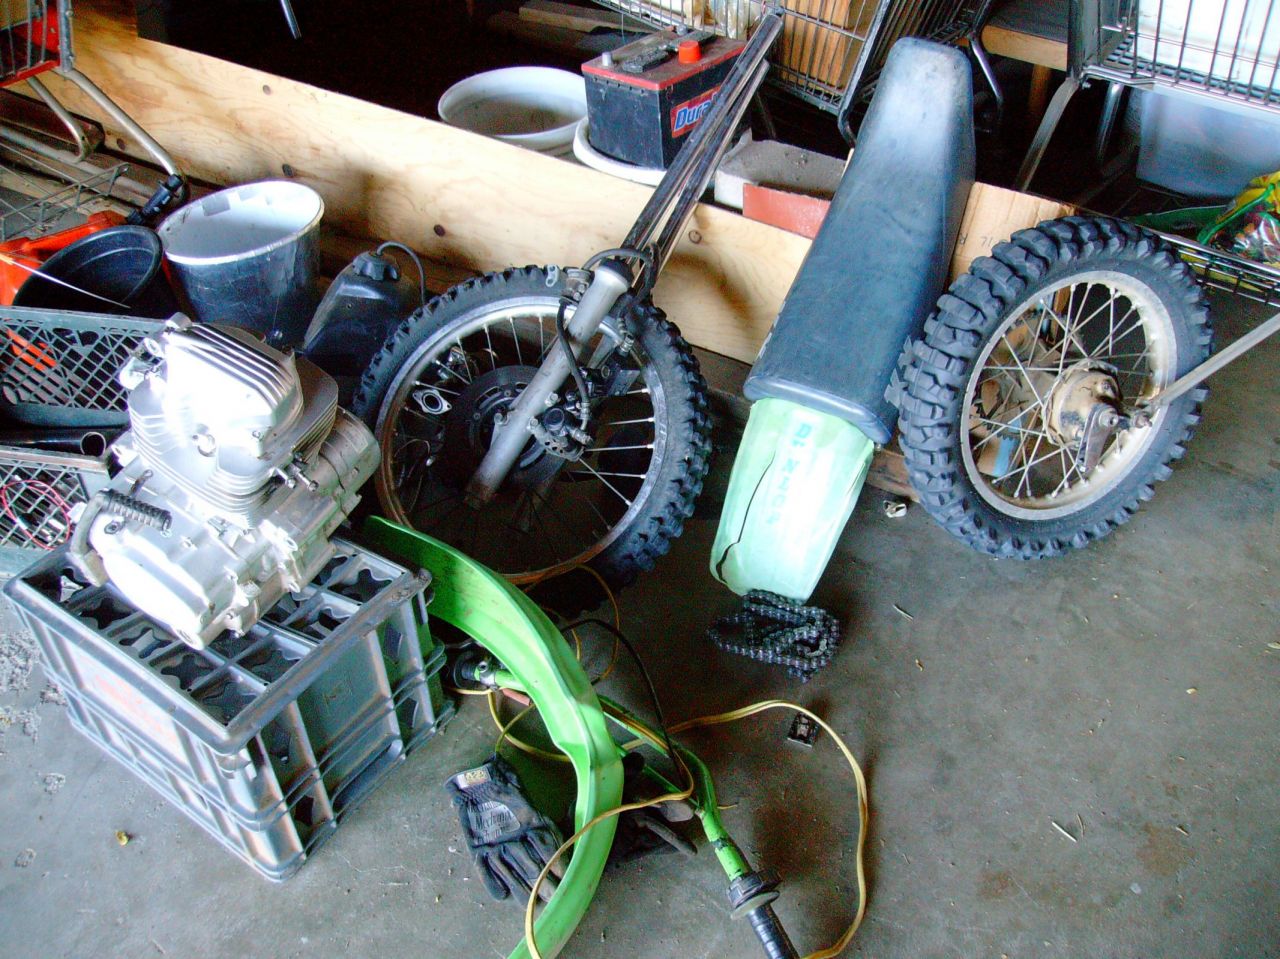
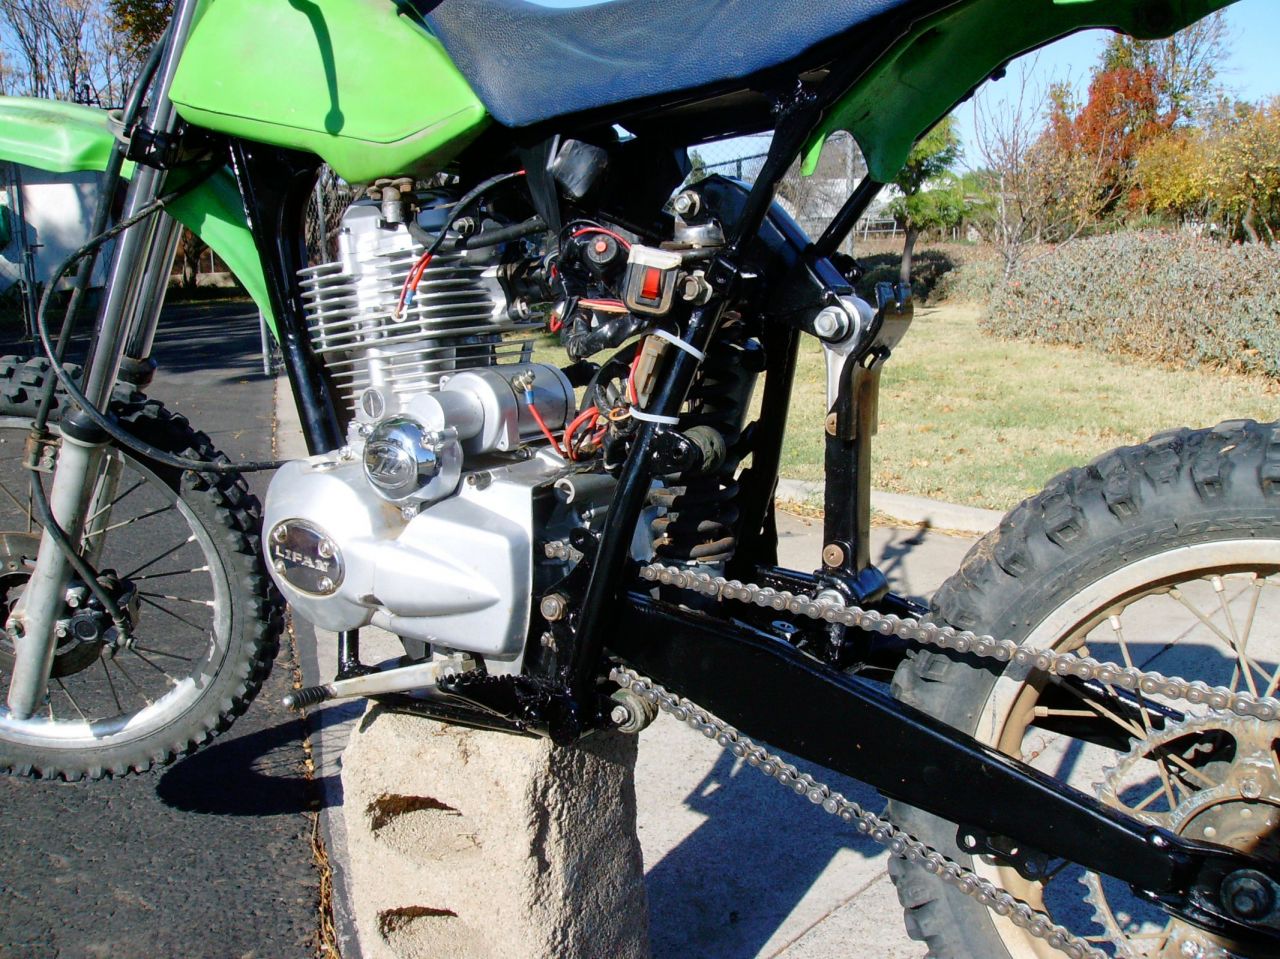
Here is the is an example of how nice and neat (or messy) the wiring can be for a Lifan 200cc. First and foremost! The diagram is important and people are always looking for it. Here is the one I found on hooperimports.com. I have no permanent battery for weight savings so, I have edited out the voltage regulator/rectifier by terminating the pink and yellow wires from the engine side. The engine will run no problem set up like the first or second Image.
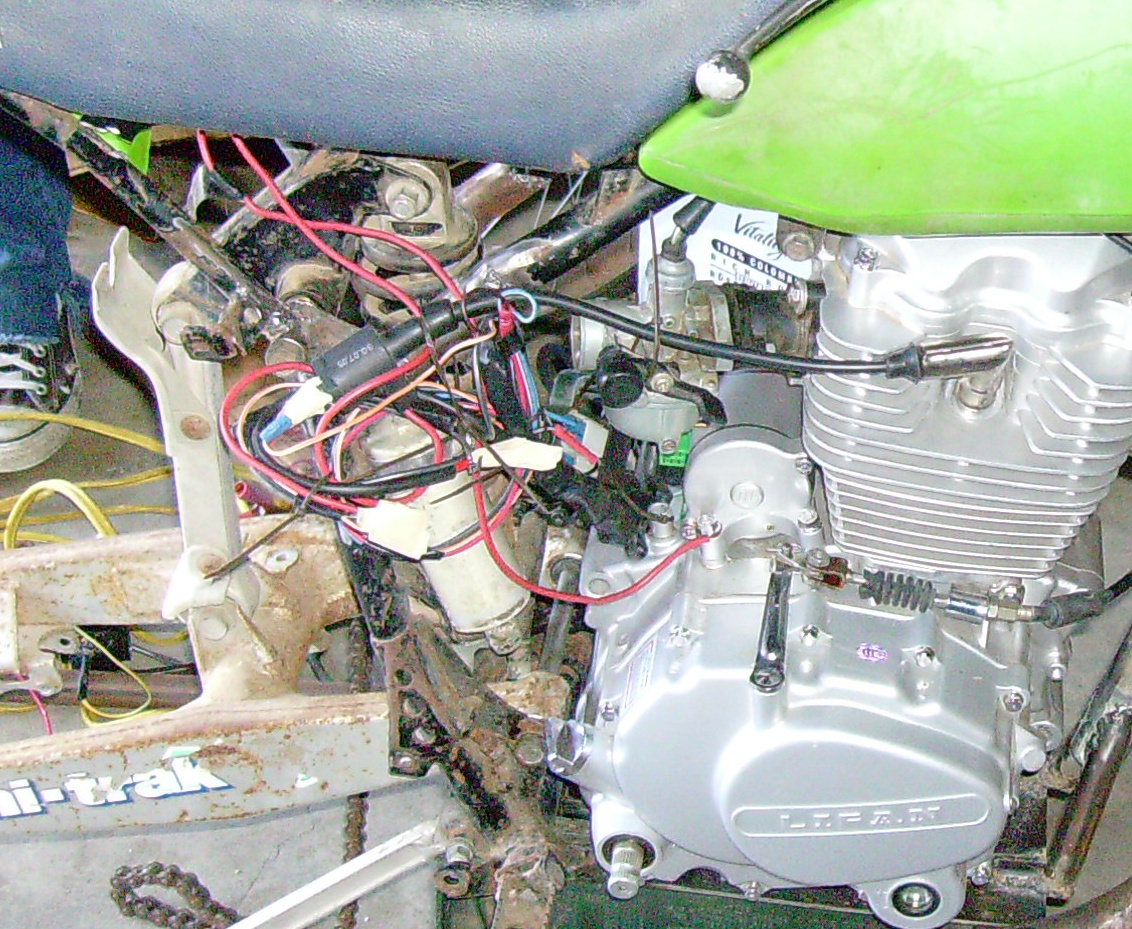
Once you have tried running the engine with no motor mounts or real exhaust the wiring may look something like this
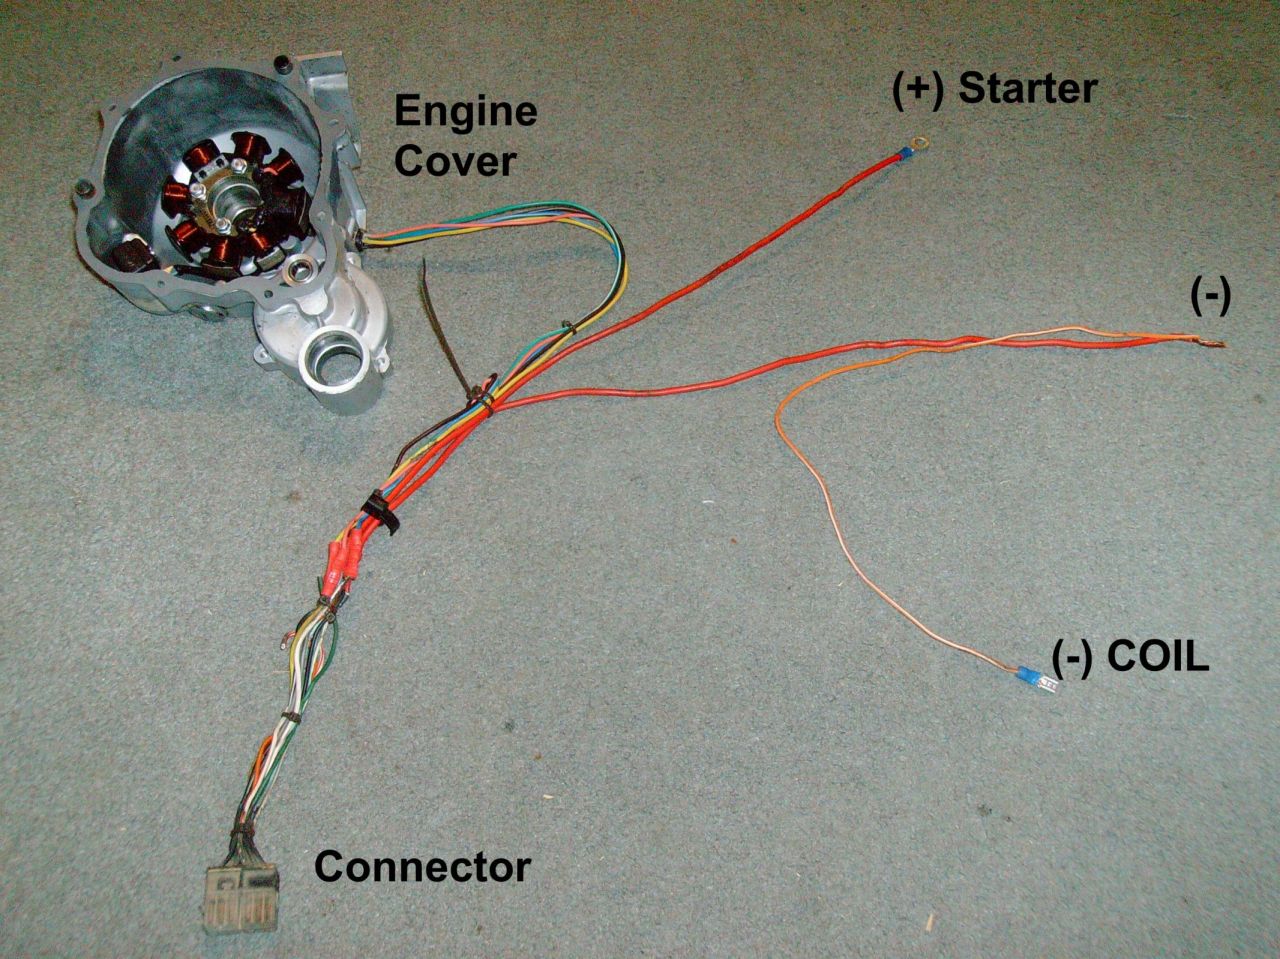
So clean yourself up and buy some connectors and find an old, multi pin connector. Put it together So that one side of the harness is all engine and the other side is frame components. I suggest using a multimeter to check all connections for continuity and then low resistance. Make sure your connections can handle being shaken to death on your bike.
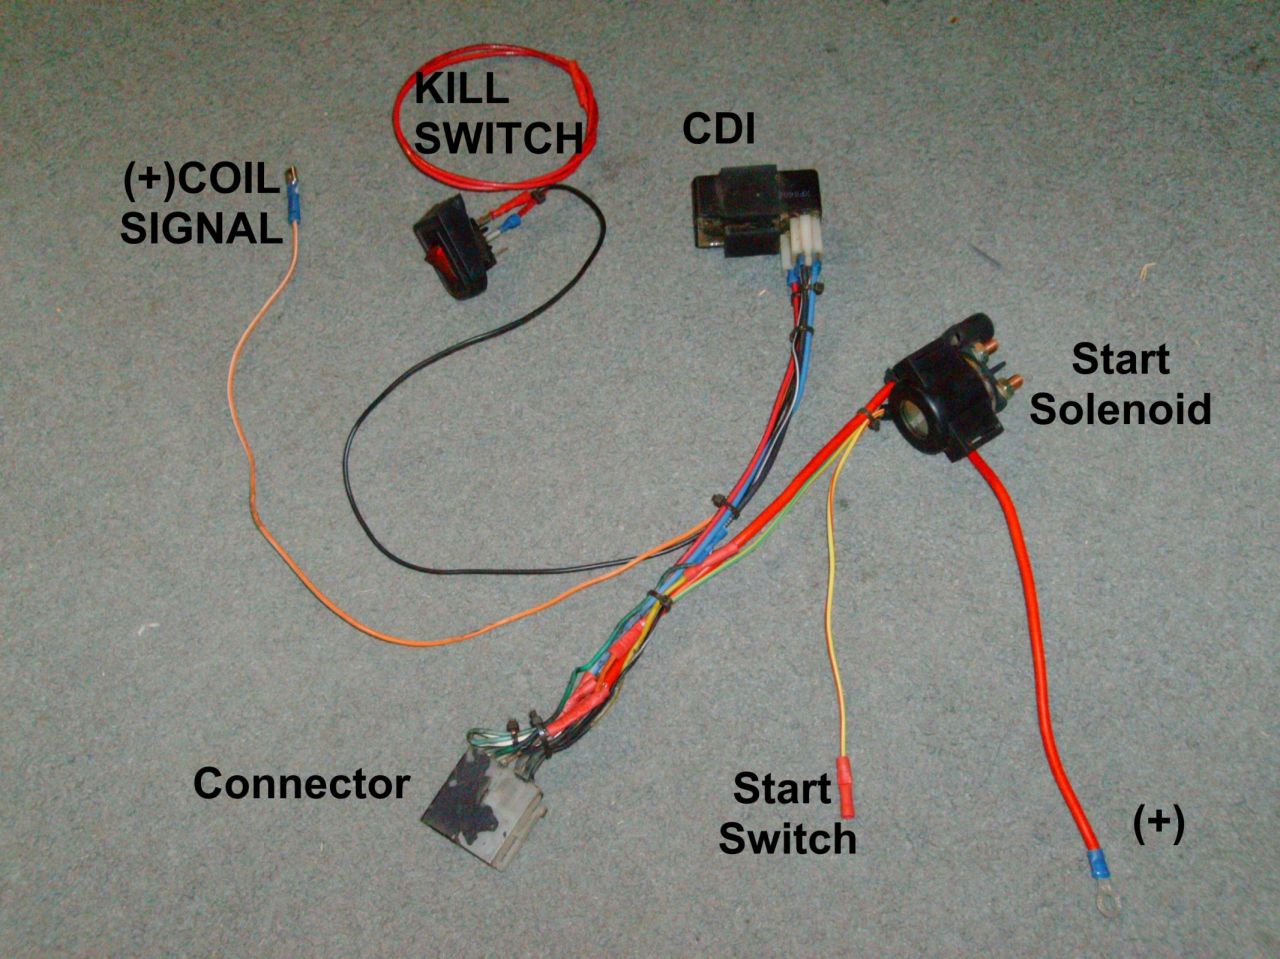
Then you should have a sweet, neat, and tidy harness like so...
These should tuck away nicely so that I will never have to think about them again. This is a vital step in assuring your mods are not bugged by wiring problems in the future.
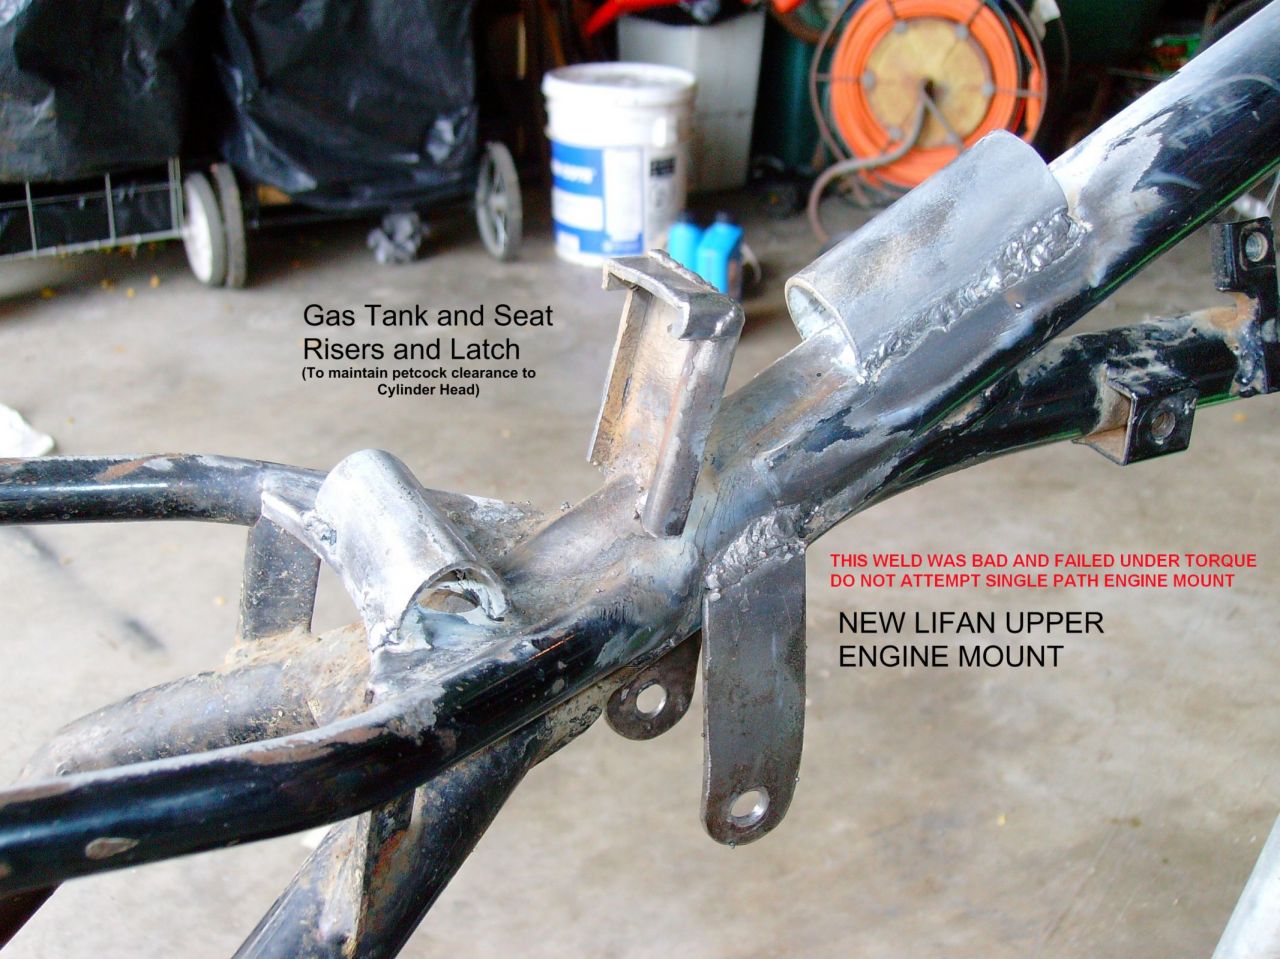
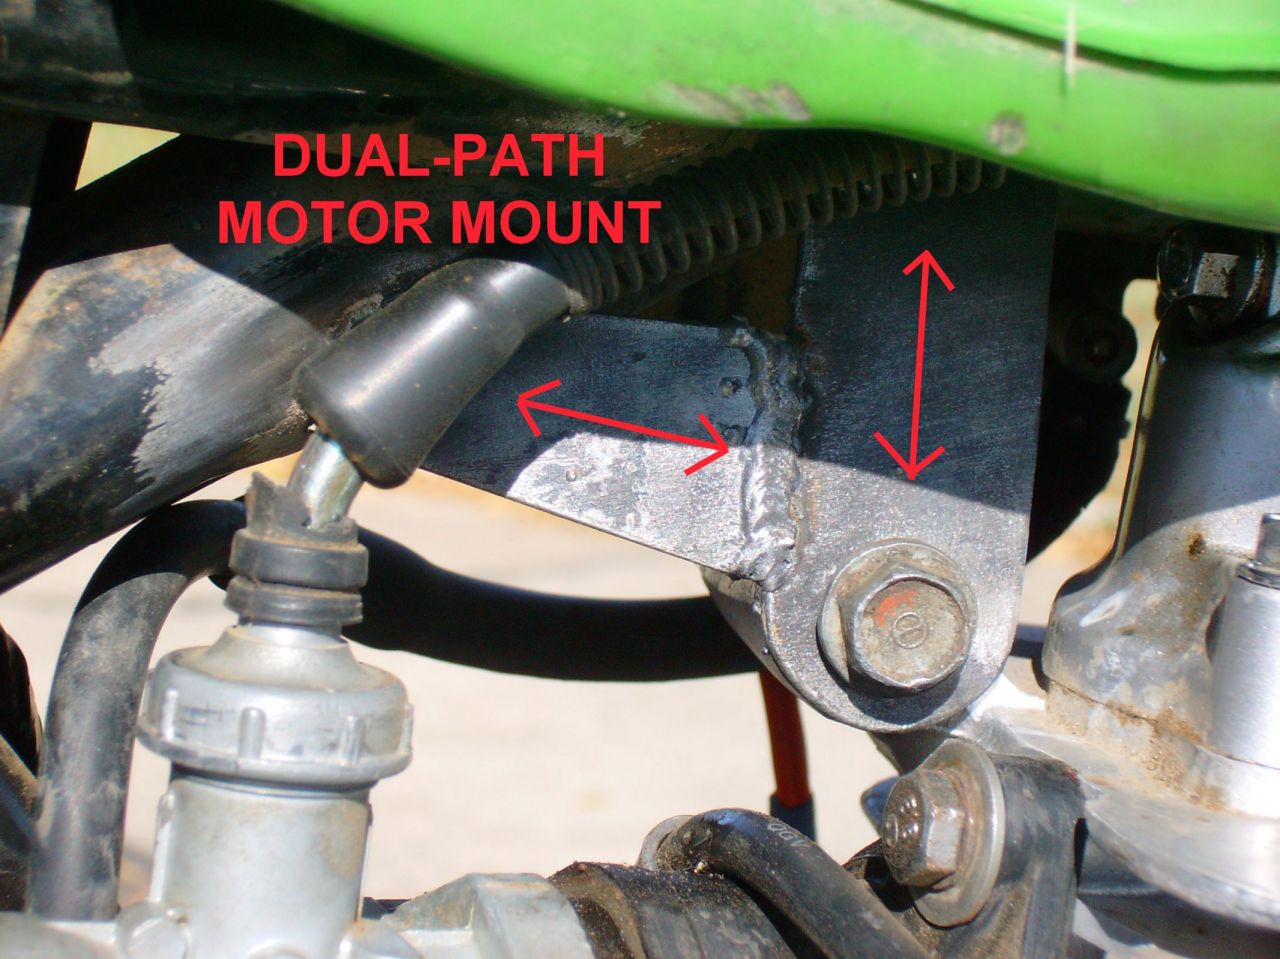
MORE TO COME. ENGINE BREAK IN VIDEOS. FRAME DE/RE CONSTRUCTION. I'LL CATCH YOU UP WITH WHERE I'M AT NOW AND WE CAN BEGIN THIS EXPERIMENT. STAY TUNED AND PLEASE SUBMIT SUGGESTIONS FOR MODS.
-BIG DAN
Lots of folks buy one or happen apon a Lifan 200cc vertical engine badged 163fml or 169fml. I was given mine free of charge. I went out and found a MAN sized mini. The 1984 Kawasaki KX80 fit me nice and had a simple enough frame to modify for jamming in the enormous 69lb vertical. Hooray!
"There is no replacement for displacement."LIFAN 163fml and 169fml have approximatly the same displacement. 197-198cc. One engine is over square (169fml) and the other is just about perfectly square (163fml). The square motor 163 will be a beautiful balance of horsepower and torque. Lots of low end and a powerful yet short top end. Maybe 8500-9000rpm redline.
Now an "over square" engine 169 has a shorter stroke then bore. These engines will rev more easily and have a higher powerband setting (500rpm). Maybe 9000-9500rpm redline. But the downsides are less torque (negligible), and less engine braking. The engine will spin very freely and have more of a "rush" of power rather then a "lump". On the road. The LF200III (streetbike)has the 169fml. In the dirt you want more lump out of the corners with the 163fml.
THIS IS MINE, 163fml BADGED LIFAN
Stay tuned to this thread for extensive CARB JET VS. EXHAUST SYSTEM TUNING.
Multiple carbs, multiple exhaust systems, extensive jet kits, lots of trial and error. This is going to be fun.
I'm going to try porting the heads. Give me some MOD ideas and i'll give anything a try. Let's do some nasty uncontrollable wheelies!Here is the is an example of how nice and neat (or messy) the wiring can be for a Lifan 200cc. First and foremost! The diagram is important and people are always looking for it. Here is the one I found on hooperimports.com. I have no permanent battery for weight savings so, I have edited out the voltage regulator/rectifier by terminating the pink and yellow wires from the engine side. The engine will run no problem set up like the first or second Image.
Once you have tried running the engine with no motor mounts or real exhaust the wiring may look something like this
So clean yourself up and buy some connectors and find an old, multi pin connector. Put it together So that one side of the harness is all engine and the other side is frame components. I suggest using a multimeter to check all connections for continuity and then low resistance. Make sure your connections can handle being shaken to death on your bike.
Then you should have a sweet, neat, and tidy harness like so...
These should tuck away nicely so that I will never have to think about them again. This is a vital step in assuring your mods are not bugged by wiring problems in the future.
MORE TO COME. ENGINE BREAK IN VIDEOS. FRAME DE/RE CONSTRUCTION. I'LL CATCH YOU UP WITH WHERE I'M AT NOW AND WE CAN BEGIN THIS EXPERIMENT. STAY TUNED AND PLEASE SUBMIT SUGGESTIONS FOR MODS.
-BIG DAN


 I know we aren't too far from each other, so if you're going to strip it down again, let me know.
 As is, Sneeze weighs 157lbs (wet).